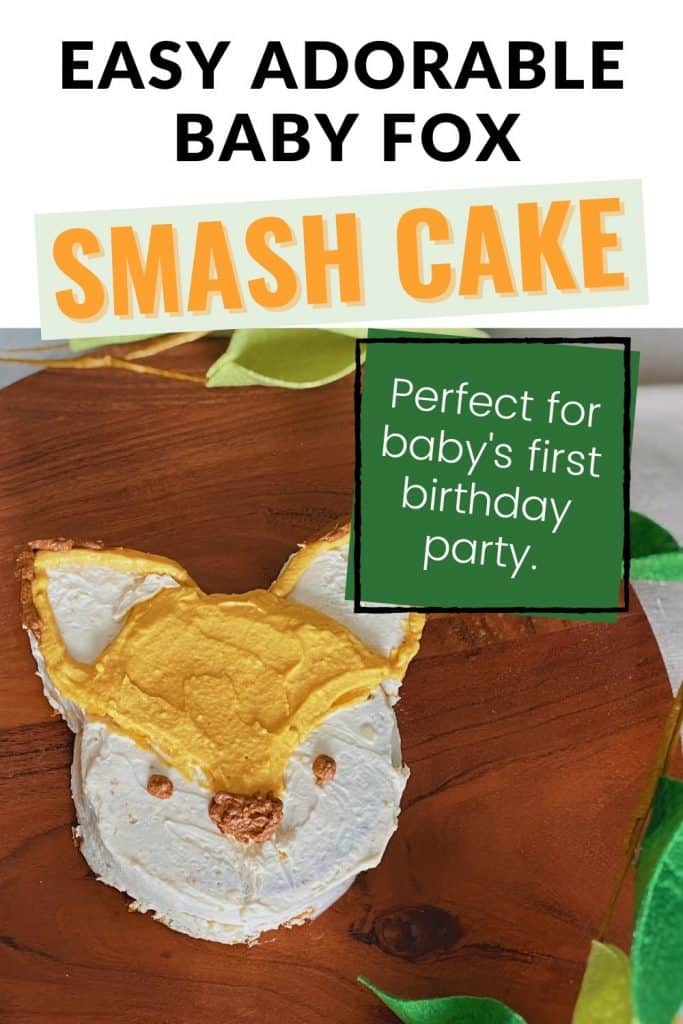
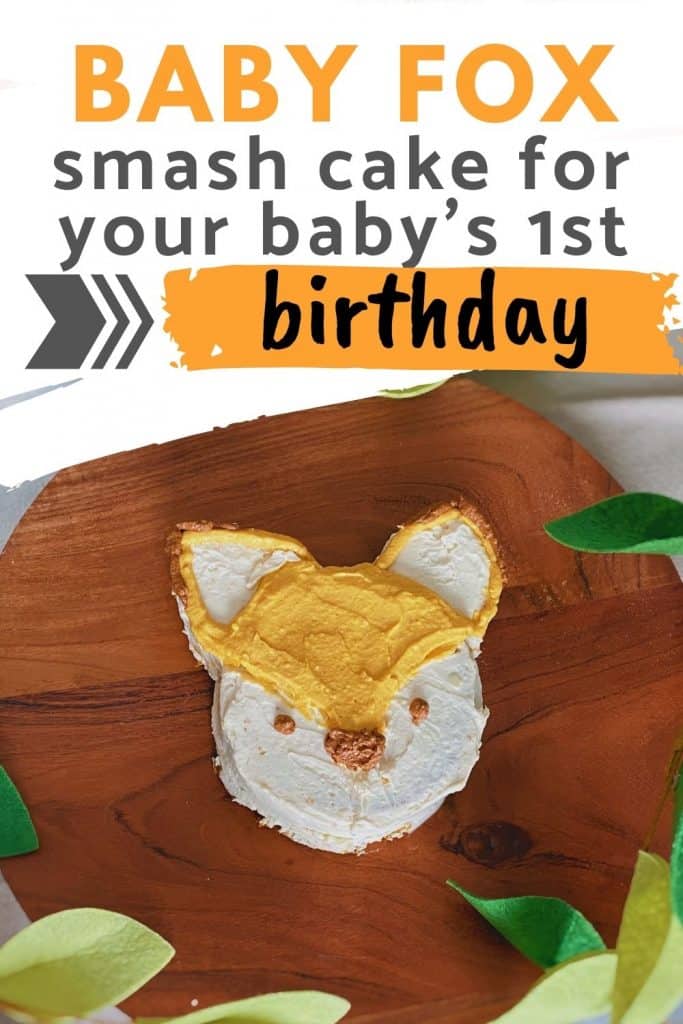
Cute little foxes make a great theme for a first birthday party for boys and girls. If you’re looking to make your baby’s smash cake, this easy-to-follow fox smash cake template will help.
Although I love a good bakery-bought cake as a special treat for birthdays, I prefer to make my baby’s first birthday smash cake myself. That way, I know exactly what goes in, and I can make it with much less sugar and no artificial dyes.
RELATED: Healthy butternut squash smash cake recipe
And once I decided I wanted a fox themed birthday party, I set out in search of a fox smash cake tutorial. It was harder than I expected to find one!
While Wilton has a fox cake tutorial, 1. It uses fondant, and 2. It wasn’t “cutesy” enough to suit me. So I decided to make my own. Fortunately, it was super easy to do.
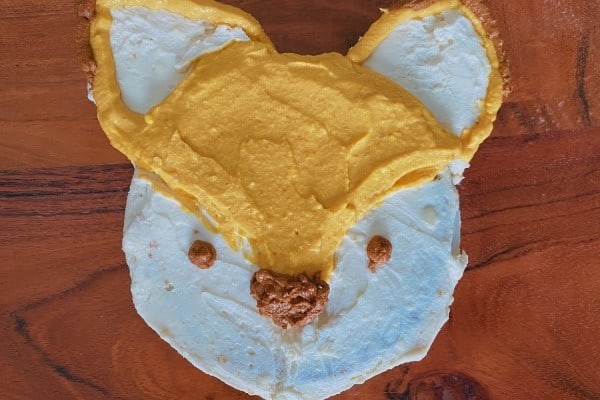
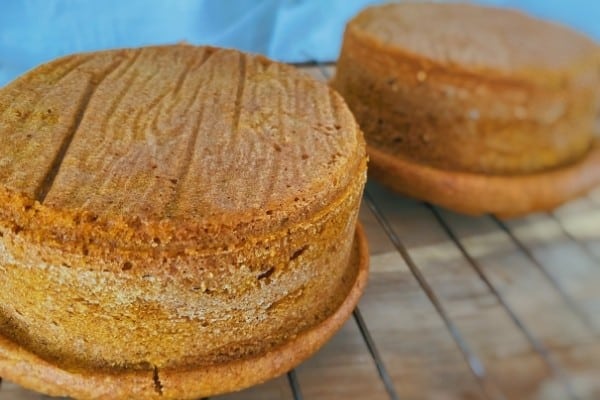
Since this is a smash cake, it’s on the small side, based on two 4 inch rounds. And in case you make a mistake carving the ears (it happens), there’s enough extra so you can make one or two more.
Read on to learn how to make a super cute fox smash cake.
Table of Contents
1. Bake and cool your cake
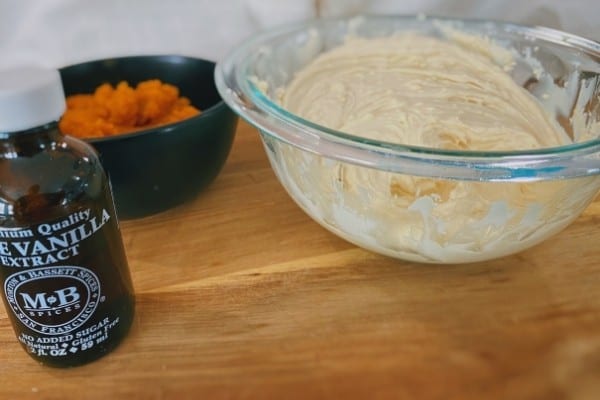
Choose whatever flavor you think your baby will like. I went for roasted butternut squash (canned pumpkin works too if that’s easier) using this recipe. Plus, I was able to use some of the squash to color my frosting.
But there are other smash cake options out there too. Often, they have less sweetener and/or no white sugar in them (do you really want to give your baby a major sugar crash on their special day?).
Here’s some great flavor options:
- Butternut squash
- Banana and applesauce
- Banana cinnamon (no added sugar or syrup)
- Vanilla oat
Whatever you choose, make two 4-inch rounds and let them cool completely. Cakes sink in the middle when they cool, so cutting them warm will make you less likely to have a level cake. Plus, you can’t frost a warm cake without the icing sliding off.
2. Make your frosting
Most smash cake frostings are made with yogurt, coconut whipped cream, or cream cheese. I chose a simple cream cheese frosting and used maple syrup to lightly sweeten it.
Be aware, most smash cake frostings have little to no powdered sugar in them, meaning that they’ll be looser than American buttercream or canned frosting. They’ll be easier to spread, but they might not stay as well (that’s part of why I went with butter and cream cheese for this cake’s frosting).
Don’t worry about coloring your frosting yet. We’ll get to that later.
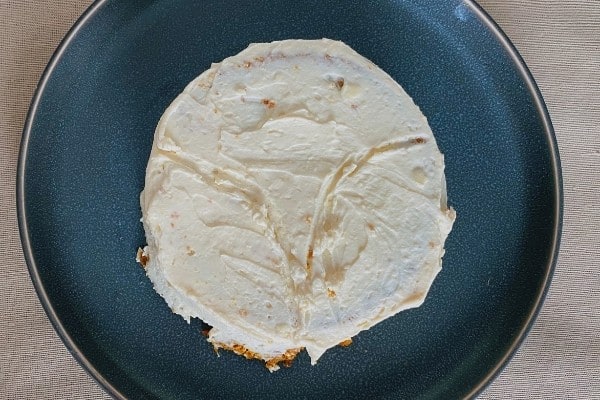
3. Trim and crumb coat your cakes
Make your life easier by leveling your cake. You can use toothpicks to mark where to cut so you don’t mess up (like shown in this tutorial).
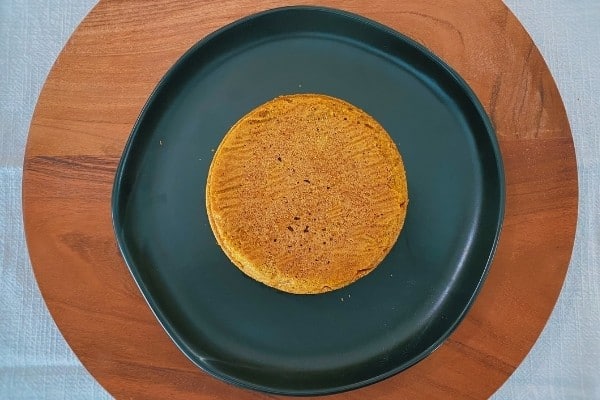
Put strips of parchment paper under your cakes to keep the plate clean while you frost them. Using a thin layer, cover both cakes with a crumb coat, and don’t worry about edges showing.
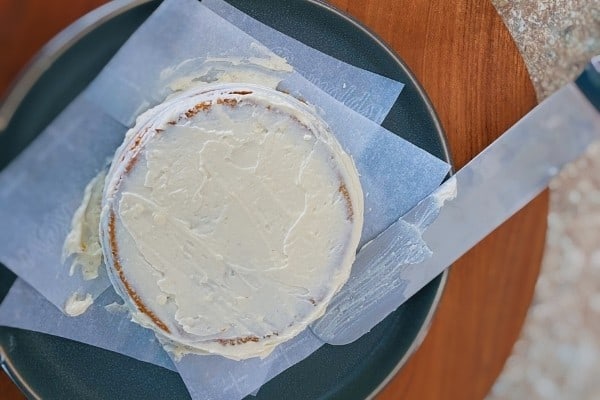
Put the cakes in the fridge to let the icing set up a little.
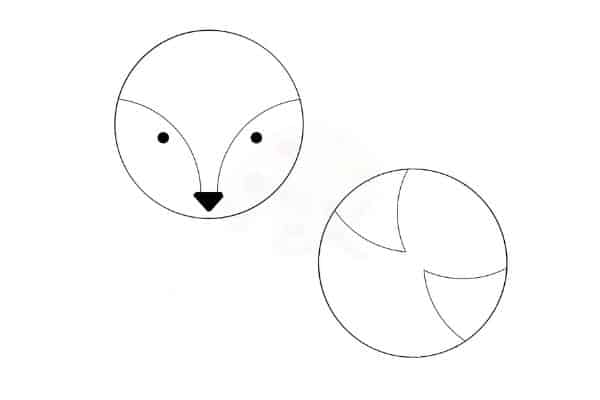
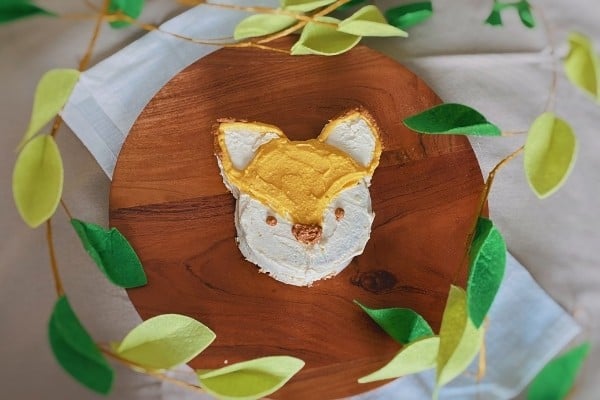
4. Carve out the ears
This cake uses one round for the face, while you carve ears from the other round. I used the outside of my cake pan to guide my knife to make arcs (so the ears have a little curve), but I’ve created a guide to help you cut the ears more easily if you prefer. Print it, then trace the pattern onto parchment paper. Then, you can cut out the paper ears, place them over the cake, and use them as a template.
And if you mess up when cutting out ears, no worries. There’s enough cake left so you can try again.
You can also use the guide to outline the fox’s “cheeks.” Once again, I just used the arc of the cake pan to guide a toothpick, leaving a light outline.
Finally, place the ears above the round where you want them. Frost the exposed sides of the ears, and use a little extra icing to make sure the ears “stick.”
5. Color your frosting orange
You can choose how you want to do this. Since I was making a butternut squash cake, I chose to add some of the pureed squash to my frosting plus a little turmeric to make a pretty orange.
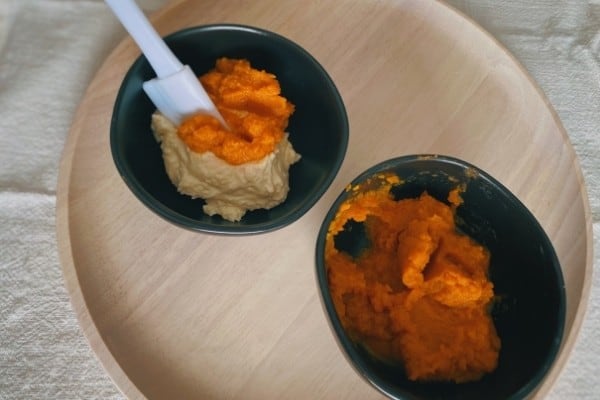
I just had to be careful not to use too much squash so I didn’t make the icing too watery.

If you prefer, you can use natural food dye like this (which probably gives you a more vivid color, honestly), or another food coloring.
6. Outline the ears and pipe the orange frosting
Put the orange frosting in a bag and then outline the “cheeks” and the ears.
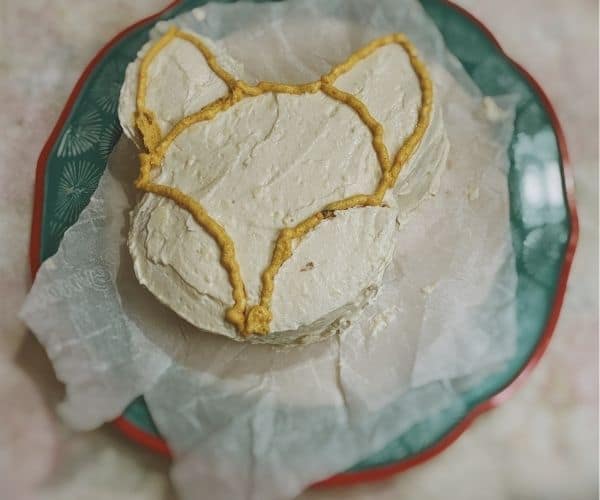
Then, you can fill in the fox’s mask with orange.
7. Add eyes, nose, and ear tips
Finally, get the rest of your orange frosting and add cocoa powder to make it brown or black (I wish I had some of this to get a darker color, but plain cocoa powder mades a good brown).
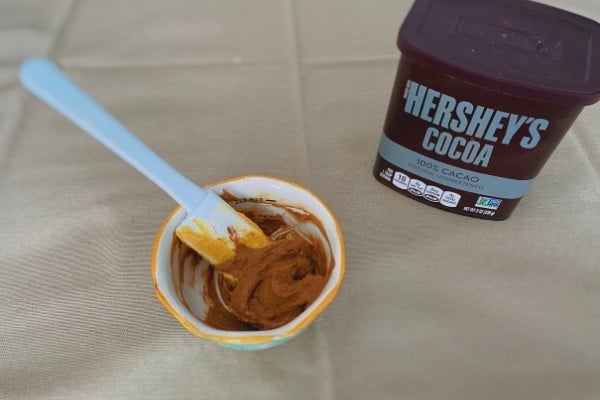
Put this in a piping bag and add the eyes and nose (I think the eyes look cuter on the white part of the face instead of the orange, but you do you). Shoot for a rounded triangular nose.
And finally, add a little outline of chocolate color to the tips of the ears.
And you’ve made an adorable fox smash cake! Look at you go.
What to do with the extra cake?
Well, that’s up to you. If you scarf all the extra pieces as you go, I’m not gonna judge.
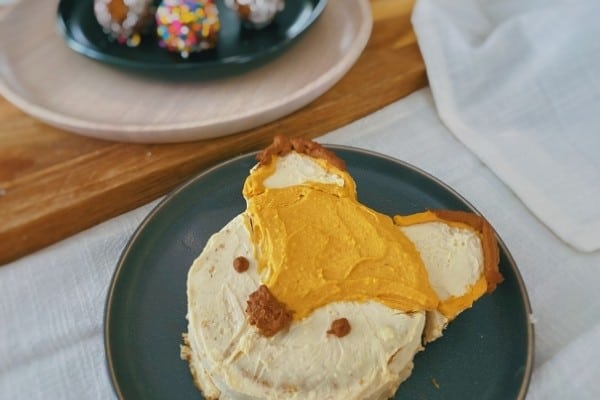
But if you want, you can mix up all the extra cake, frosting, and roasted squash to make cake balls. My baby’s big brother and sisters had a blast making these.
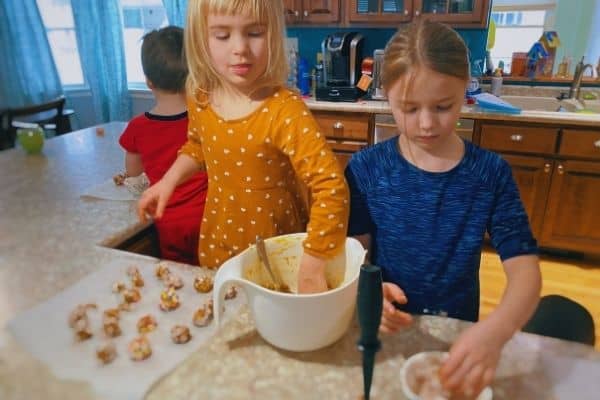
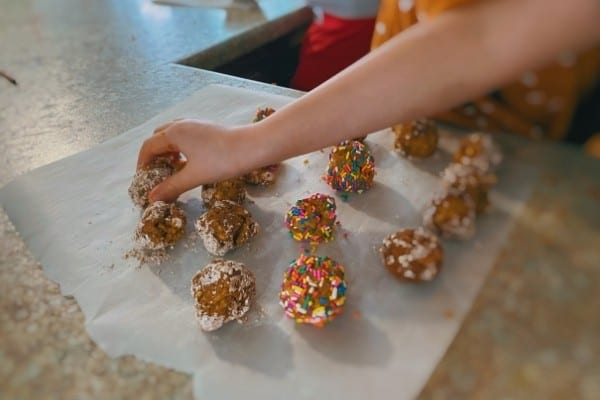
We covered some in cinnamon sugar and some in sprinkles. And they were tasty!
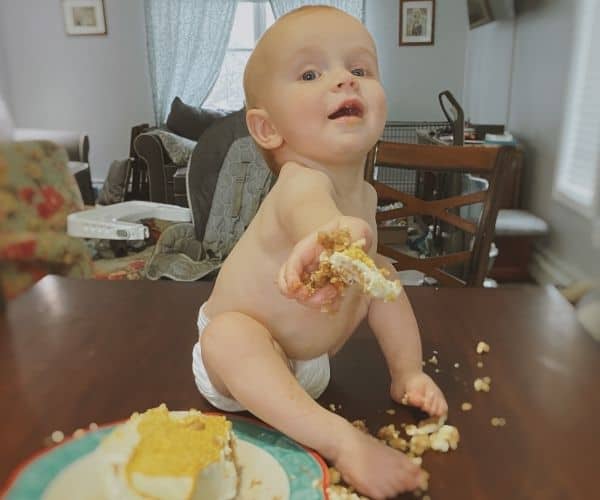
And of course, here’s a picture of the birthday boy himself showing off his special cake. He loved it.
So there’s my easy fox cake tutorial. It’s perfect for a smash cake or other kid’s birthday party. I hope you have as much fun making it as I did.